Clip Art Can Be Accessed by Clicking on Which Button Quizlet Lesson 8
Lesson 16: Inserting Prune Art and Pictures
/en/word2010/text-boxes-and-wordart/content/
Introduction
Images are a keen way to liven upwards a document, and Discussion offers a few methods to insert them. There are built-in clip art images for just about every topic, so you may be able to find a perfect clip fine art prototype for your document. If you accept a more than specific image in mind, you can insert a film from a file.
In this lesson, you will learn how to search for and insert clip art, how to insert an image from a file, and how to change the text wrapping settings for your images.
Inserting clip fine art and pictures
Adding clip art and pictures to your document can be a great way to illustrate important information or add together decorative accents to existing text. You can insert images from your calculator or search Microsoft's all-encompassing selection of clip art to observe the image you need. In one case an image has been inserted, you can format text to wrap around the paradigm.
To locate prune fine art:
- Select the Insert tab.
- Click the Clip Fine art command in the Illustrations group.
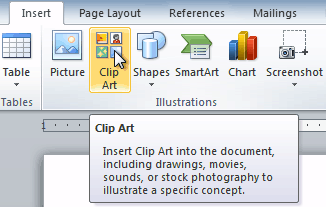 The Clip Fine art command
 - The clip art options appear in the task pane to the right of the document.
- Enter keywords in the Search for: field that are related to the paradigm you want to insert.
- Click the drop-down pointer in the Results should be: field.
- Deselect any types of media y'all practice not want to come across.
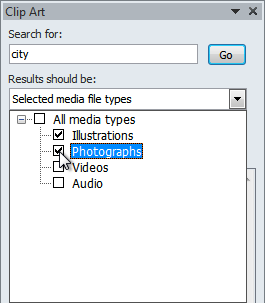 Choosing which media types to display
 - If yous besides want to search for clip fine art on Function.com, place a check marking next to Include Office.com content. Otherwise, information technology will just search for clip art on your computer.
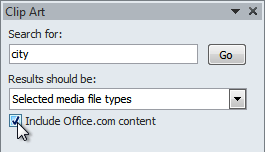 Including Part.com content
 - Click Get.
To insert clip fine art:
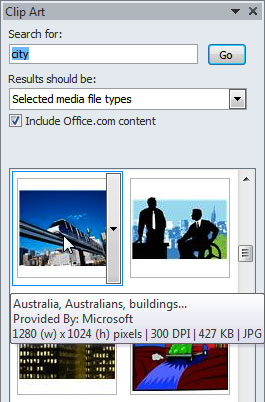
- Review the results from a clip art search.
- Place your insertion bespeak in the document where yous want to insert the clip art.
- Click an image in the Clip Art pane. Information technology will announced in the certificate.
 Selecting a Clip Art image
You can likewise click the drop-downwards arrow next to the image in the Clip Art pane to view more than options.
To insert a picture from a file:
- Place your insertion bespeak where y'all want the image to appear.
- Select the Insert tab.
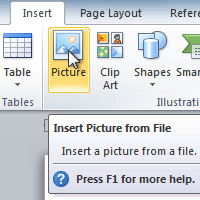
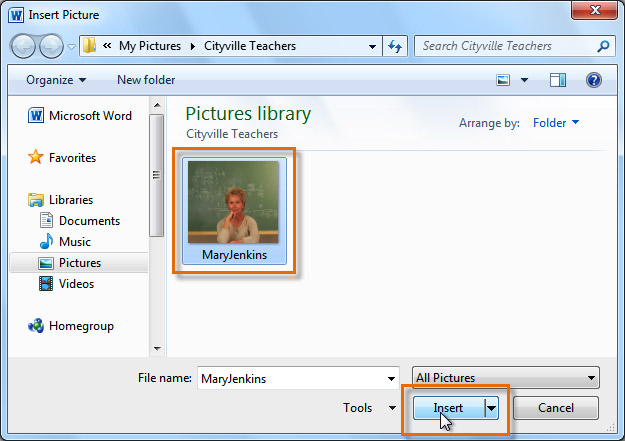
- Click the Picture command in the Illustrations group. The Insert Picture dialog box appears.
 Inserting a picture show from a file
 - Select the desired image file, and so click Insert to add together it to your document.
 Selecting an image file
To resize an image, click and elevate one of the corner sizing handles. The image will change size while keeping the same proportions. If you desire to stretch it horizontally or vertically, you tin can use the side sizing handles.
Changing text wrapping settings
When you insert prune art or a picture from a file, yous may notice that it'southward difficult to motility information technology exactly where y'all desire. This is because the text wrapping for the paradigm is set up to In Line with Text. You lot'll demand to change the text wrapping setting if you desire to motility the image freely, or if you only want the text to wrap around the epitome in a more natural mode.
To wrap text effectually an image:
- Select the epitome. The Format tab volition appear.
- Click the Format tab.
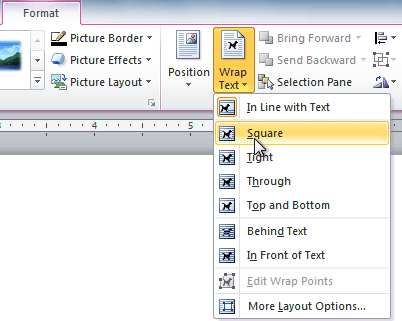
- Click the Wrap Text command in the Adjust group.
- Select the desired carte du jour option. The text volition accommodate based on the option you have selected.
 Choosing a text wrapping setting
 - Move the image around to see how the text wraps for each setting.
If you can't become your text to wrap the way you want, click the Wrap Text command, then select More than Layout Options from the menu. Yous can make more precise changes in the Advanced Layout dialog box that appears.
To use a predefined text wrapping setting:
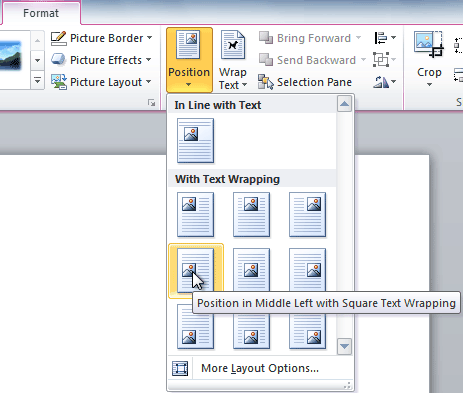
- Click the Position command to the left of the Wrap Text control. A driblet-down menu will appear.
- From the drop-down menu, select the desired prototype position.
 Choosing an epitome position
 - The image volition move to the position you accept selected, and it will automatically accept text wrapping applied to it.
Challenge!
- Create a new Word document.
- Insert a clip art image.
- Insert a picture from a file into the document.
- Resize the picture.
- Change the text wrapping setting to In Front of Text.
/en/word2010/formatting-pictures/content/
Source: https://edu.gcfglobal.org/en/word2010/inserting-clip-art-and-pictures/1/
Post a Comment for "Clip Art Can Be Accessed by Clicking on Which Button Quizlet Lesson 8"